Restoring a physical machine to Microsoft Hyper-V environment
User guide: Restoring a Physical Machine as a New VM in Proxmox VE
This guide provides detailed instructions to restore a Windows Entire Machine Backup (EMB) as a fully functional Virtual Machine (VM) in a Proxmox environment using the IDrive application. Whether you are recovering from hardware failure, migrating to a virtual environment, or setting up a test system, this process enables quick and reliable recovery of your complete system - including the operating system, applications, and data - with minimal downtime.
1. Prerequisites
Before beginning the restore operation, ensure the following:
- Access to Proxmox Environment
You must have valid credentials to log in to the Proxmox VE environment using the Proxmox VE web interface. - Available Entire Machine Backup
A complete online Entire Machine Backup must exist in your IDrive account. - Download the state.xml File
This configuration file identifies the partition type and OS details. Path: IDMachineBackup > <MachineName> > state.xml. - Download the System Recovery ISO
Obtain the appropriate ISO file (SystemWinRE.iso) used for recovery. Download Link
Select the appropriate SystemWinRE.iso file based on the partition type (MBR or GPT) specified in the state.xml file. - Sufficient Proxmox Storage and Resources
Ensure that the Proxmox host has sufficient storage space and compute resources to host the new virtual machine. - Download ISO for GPT Partition
- Download ISO for MBR Partition
2. Restore process
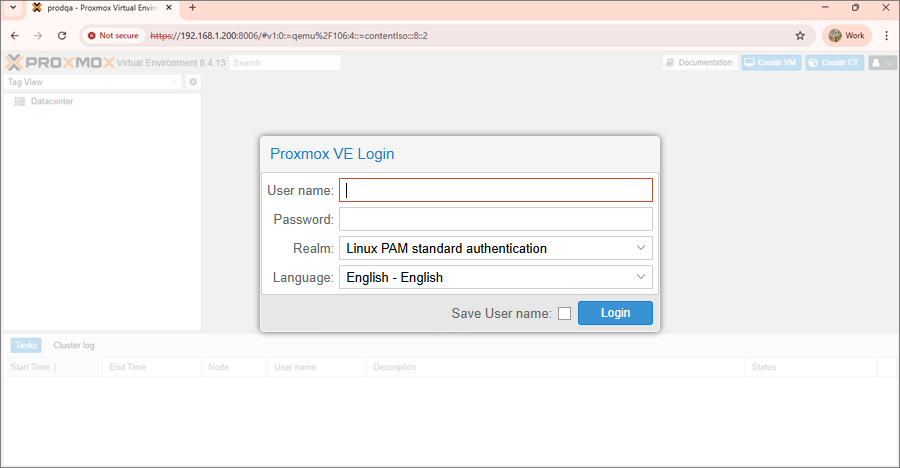
2.1 Access the Proxmox Environment
Sign in to your Proxmox VE web interface using your admin credentials.
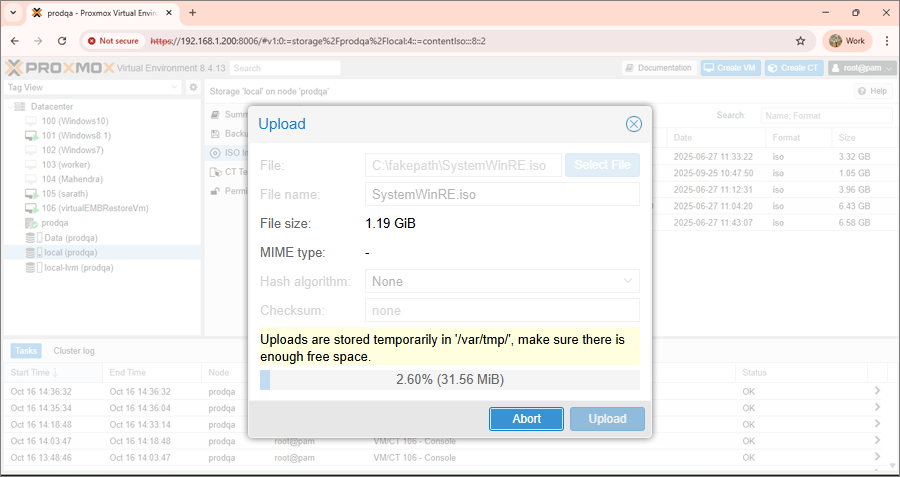
2.2 Upload System Recovery ISO
- Navigate to Datacenter > Storage and select the desired storage location.
- Click ISO Images > Upload.
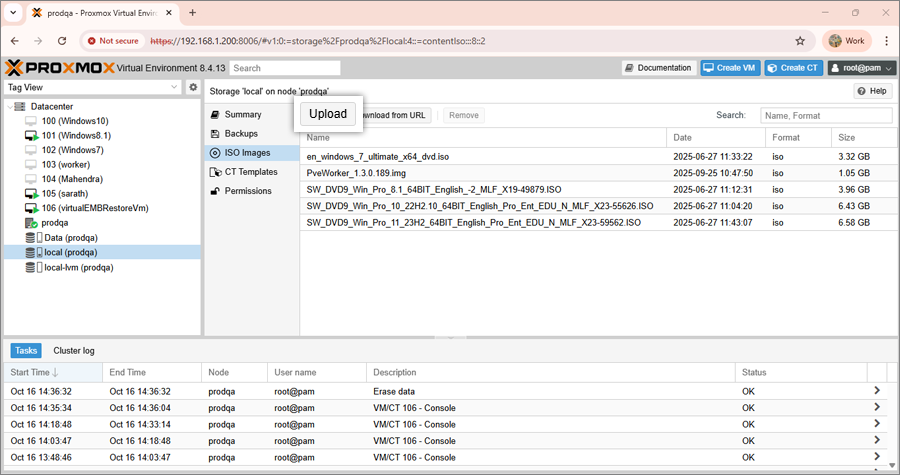
- Select and upload the downloaded SystemWinRE.iso file.
2.3 Create and Configure a New Virtual Machine
- Navigate to Datacenter in the Proxmox dashboard.
- Click Create VM in the top-right corner.
- Enter a name for the virtual machine and click Next.

- Select the ISO image file and choose the appropriate Guest OS type.
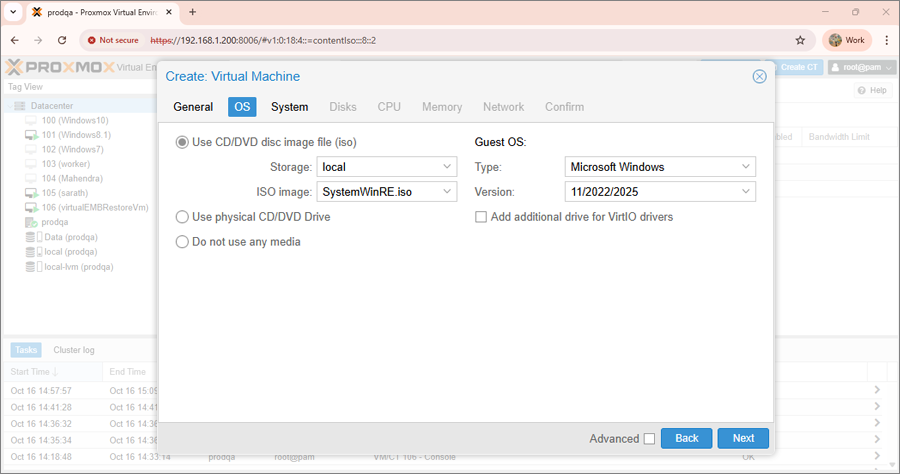
- Click Next.
- On the System configuration screen, clear the following options:
- Add EFI Disk
- Add TPM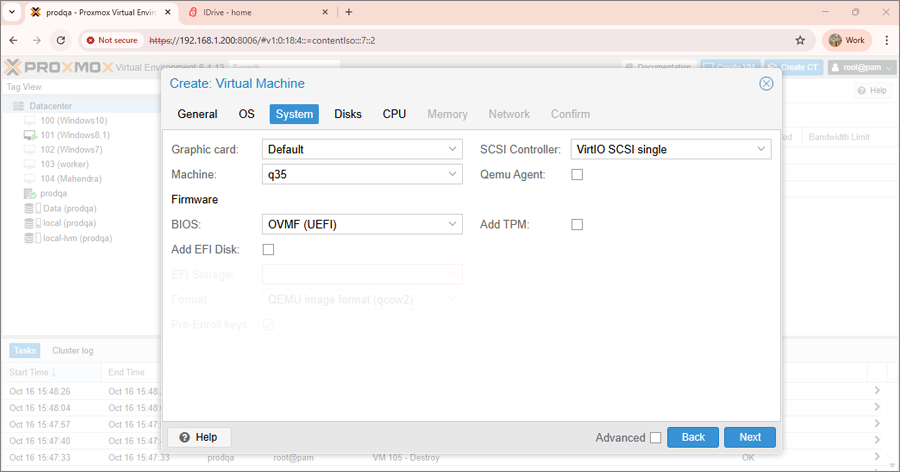
- On the same page, configure firmware based on the partition type specified in the state.xml file:
MBR - Set Firmware to Default(SeaBIOS)
GPT - Set Firmware to OVMF(UEFI) - Click Next.
- Specify the disk size as required.

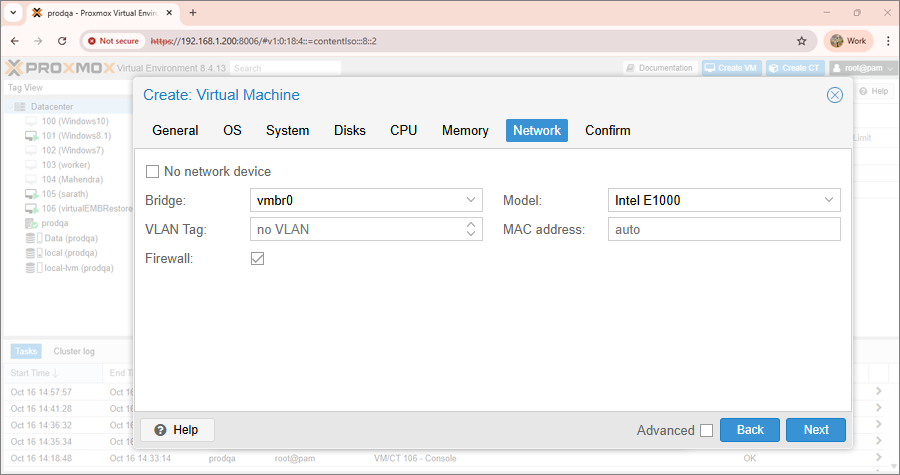
- Review and adjust the CPU, Memory, and Network settings as needed.
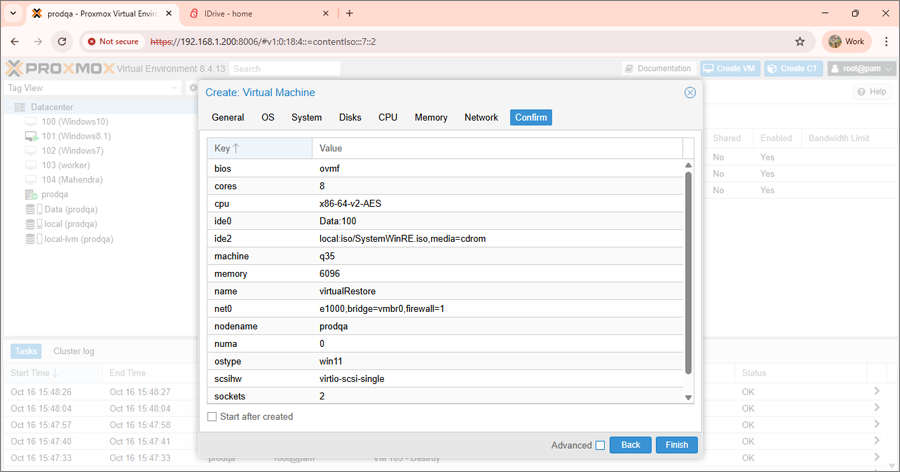
- Click Next, review the configuration summary, and click Finish to create the VM.
3. Boot and Restore Using IDrive
- Open the Console for the newly created VM.
- Click Start Now to power on the VM.
- The VM will boot using the SystemWinRE.iso image.
- When prompted, log in using the credentials for the WinRE environment.
The VM will load the IDrive System Recovery Environment. - Restore the backup from your IDrive cloud account or from an external HDD connected to the Proxmox host containing the Entire Machine Backup data.
3.1 Restore from IDrive Cloud Backup Account
- Sign in to your IDrive cloud backup account within the recovery interface.
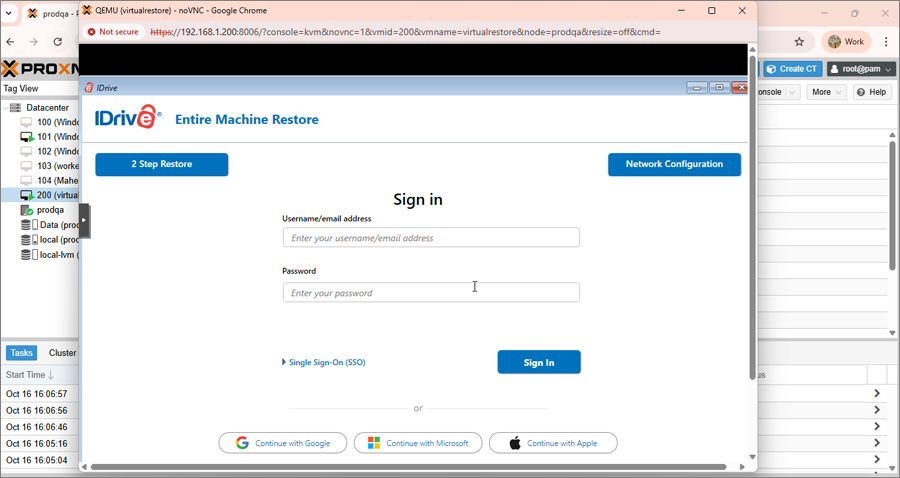
- Select Online Backup and locate your machine.
- Navigate to the IDMachineBackup folder.
- Select the required disks to restore.
- Click Restore Now to start recovery.
You can perform the restore in two ways:
- 1-Step Restore: Click here to learn about the 1-step restore process.
- 2-Step Restore: Click here to learn about the 2-step restore process.
4. Post Restoration
- Once the restoration is complete, shut down the VM.
- In the Proxmox dashboard, select the VM > Hardware > CD/DVD Drive > Edit, then choose Do not use any media.
- Power on the VM to boot from the restored disk.
5. Important Notes
- Always use a valid and complete backup before starting the restoration process.
- Ensure that the Proxmox host has sufficient CPU, RAM, storage, and network connectivity.
- Verify the partition type (MBR or GPT) and corresponding firmware setting (BIOS or EFI) as specified in the state.xml file.
Passthrough USB/External Drive to a Proxmox
Virtual Machine
- In the Proxmox dashboard, select the VM.
- Go to the Hardware tab.
- Click Add > USB Device.
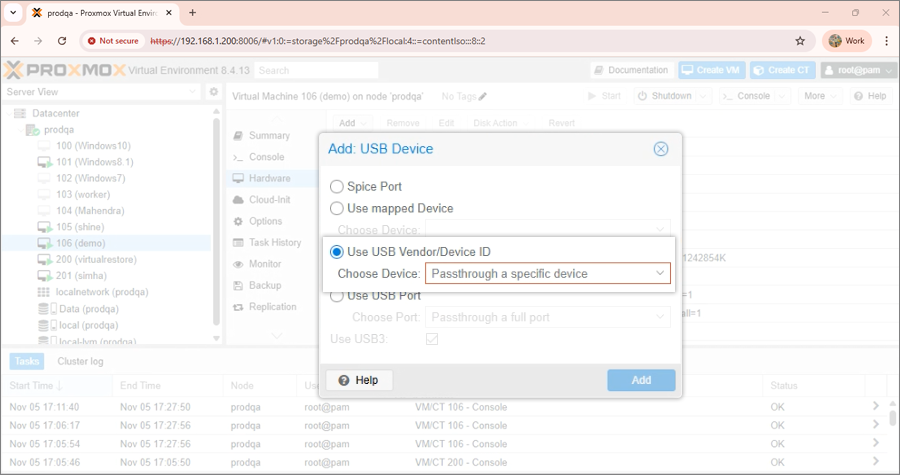
- In the dialog box, select Use mapped Device and choose the desired drive from the Choose Device dropdown.
- Click Add to attach the USB device to the VM.
You have successfully restored your physical machine as a virtual machine in Proxmox VE using IDrive. Verify that the VM boots correctly, all data is intact, and the system functions as expected.